Jekyll을 이용한 github 블로그 만들기
github.io의 주소를 가지는 github블로그 만들기
github repository 생성하기
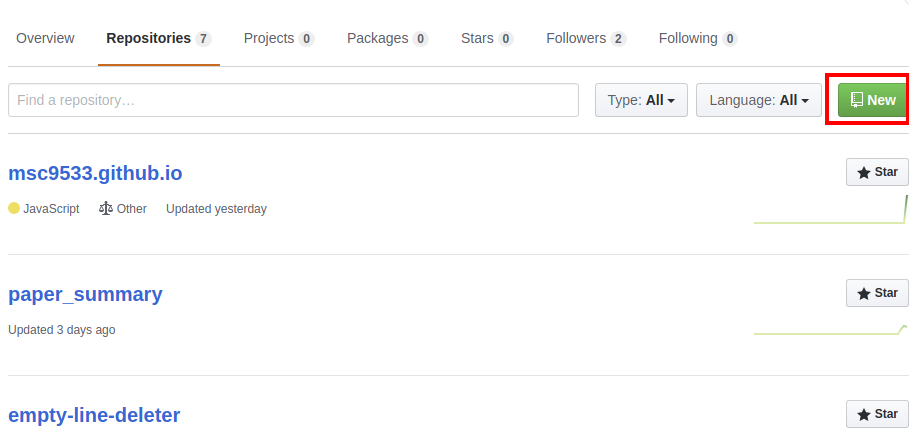
github의 블로그를 만들기 위해서는 먼저 블로그 repository를 생성해야 합니다.
하단 그림의 빨간 박스에 있는 new버튼을 눌러 새로운 repository를 생성합니다.
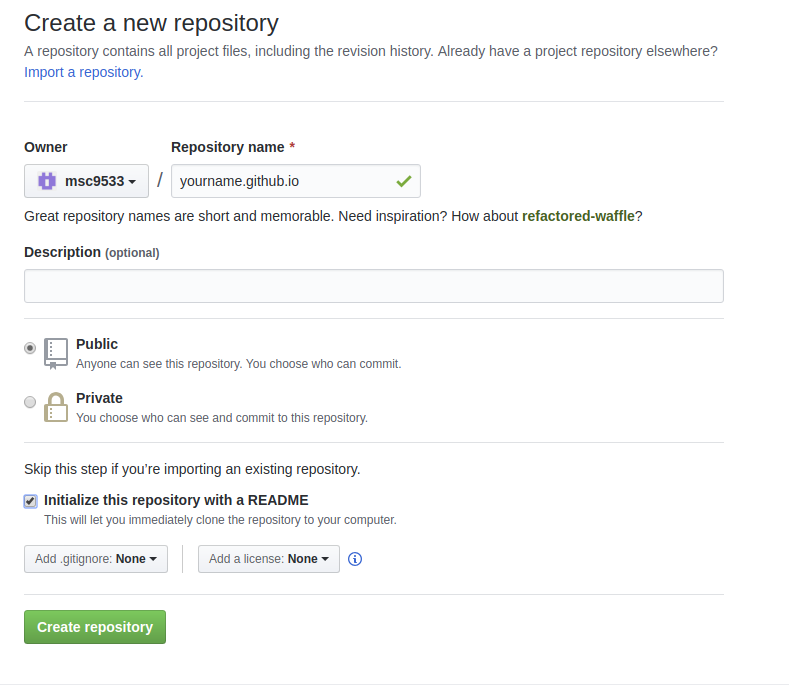
Repository의 이름을 블로그이름.github.io로 생성을 해줍니다. 이 Repository의 이름이 블로그의 주소가 됩니다.
예를 들어 제 블로그를 생성할때 Repository의 이름을 msc9533.github.io으로 생성을 했기 때문에 https://msc9533.github.io가 블로그의 주소가 됩니다.
또 Initialize this repository with a README의 옵션을 체크해 주어 하단의 Create repository를 누르면 쉽게 블로그를 생성할 수 있습니다.
repository를 생성한 후 로컬 저장소에서 clone을 진행 해 줍니다.
Jekyll 테마 적용하기
Jekyll이란?
markdown, HTML 등의 언어로 작성된 글을 정적 웹사이트로 변환해 업로드 할 수 있게 해주는 사이트 개발 툴입니다. 정적페이지기 때문에 속도가 빠르고 github에 업로드 하는 경우 Jekyll과 Ruby를 굳이 설치 하지 않아도 됩니다.
테마 적용
먼저 이 페이지에서 마음에 드는 테마를 선택합니다. 저는 jekyll-clean-dark라는 이름의 테마로 선택 했습니다.
아래부터는 테마에 따라 다른 내용이 있을 수 있으므로 참고하시기 바랍니다.
github페이지로부터 테마를 다운로드 합니다.
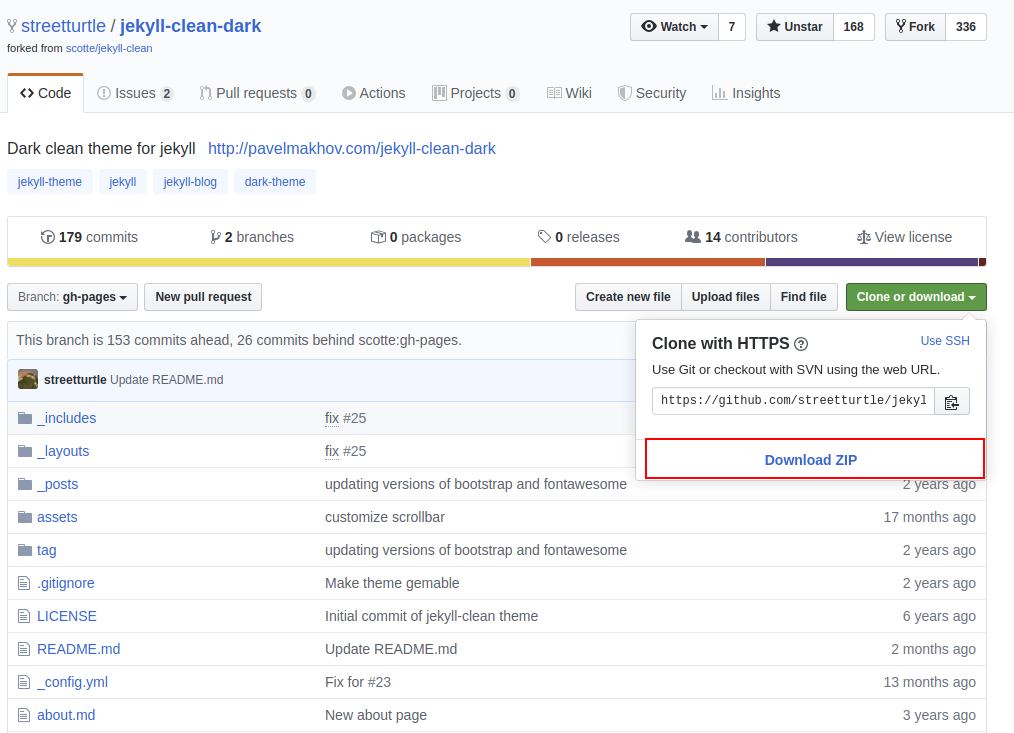
다운로드된 테마의 파일들을 로컬저장소에 옮깁니다.
이후 _config.yml파일을 몇가지 수정해야 합니다.
# Jekyll configuration

# 블로그의 이름과 description입니다.
name: Blog Name
description: Software Developer

# Url is currently only used only for the RSS feed in feed.xml
url: http://streetturtle.github.io # blog url을 적어줍니다. local에서 jekyll을 빌드하는 경우
#url: http://localhost:4000 # 이 url을 사용합니다.

# For a project page here should be a project name. Otherwise (for user's/organization's page leave it empty)
baseurl: '/jekyll-clean-dark'

author: Pavel Makhov # 블로그 하단에 표시될 이름과
copyright: 2015-2018 # copyright입니다.

# 포스트의 sns공유 여부입니다.
share:
  facebook: true
  twitter: true
  gplus: true
  linkedin: true
  pinterest: true
  email: true

# 자신의 sns계정 정보를 적어줍니다. 이후 하단의 아이콘에서 링크가 생성됩니다.
social:
  github: streetturtle
  stackoverflow: ''
  linkedin:
  instagram: ''
  lastfm: ''
  rss: feed.xml

# Google Analytics key, leave blank to ignore
google_analytics_key:
# Yandex metrica (https://metrica.yandex.com/) leave blank to ignore or put true to use
yandex_metrica:


# Set this to your disqus shortname to enable comments. Note that the 'comments'
# setting below must also be true. Individual posts can override 'comments' to
# disable on a post-by-post basis
# diqus계정 정보와 comments enable여부를 적어줍니다.
disqus: streetturtle
comments: false

permalink: /:year/:month/:title/

# Enable for using pages, more details are here: http://jekyllrb.com/docs/pagination/
#paginate: 3

#highlighter: rouge

markdown: kramdown
kramdown:
  input: GFM # Enable GitHub Flavored Markdown (fenced code blocks)
  hard_wrap: true

# jekyll을 빌드할때 제외할 항목입니다
exclude: ['README.md', 'LICENSE']
수정이 완료 되었다면 여기까지의 내용을 push 하고 자신의 블로그주소로 이동해 적용된 테마를 확인합니다.
